
The Story Behind Boston Pizza :
Jim Treliving first purchased the Boston Pizza in Penticton, B.C., Canada 🇨🇦. After that he partnered up with investor Don Spence. They then went out and purchased the Boston Pizza Franchise rights in British Columbia only, except one owned by Ron Coyle in Vancouver and one in Edmonton.
It’s Ron Coyle who started up Boston Pizza from the get-go, in Edmonton, Alberta, downtown on Jasper Ave in 1963. Back then it was called Boston Pizza Spaghetti House. Ron named his pizza restaurant Boston Pizza Spaghetti House, because ( back then) Edmonton didn’t have its own hockey team. Apparently, it was a Boston fan, so he decided to name his restaurant after his favourite hockey team, Boston Bruins. He knew the sports minded Edmontonians would come to his restaurant to watch the game.
Which they did !
Interesting, Jim Treliving began his career as a RCMP constable with the Royal Canadian Mounted Police.
In 1968, while still with the RCMP, Treliving noticed the growing popularity of Boston Pizza and purchased the rights to open a restaurant in Penticton, British Columbia. With the help of investor Don Spencer, he was able to purchase the B.C. Franchise for 3 million dollars at first.
During that same year, the headquarters of Boston Pizza was moved from Edmonton, Alberta to Richmond, British Columbia where it is found today.
While in Penticton, he met George Melville, a chartered accountant. Melville acted as Treliving’s business consultant for four years until 1973, at which time he too became Treliving’s partner in the business.
In 1983, Treliving and Melville acquired the Boston Pizza chain from then-owner Ron Coyle.
The two then invested in 15 of their restaurants to begin the franchisees, converted one restaurant to a corporate training restaurant. By 1995 the chain had grown to 95 restaurants in Western Canada with sales in excess of $110 million (CAD)
So – it looks like Jim Treliving had investor help from the very start, in order to buy this large investment from Ron Coyle. I believe that’s why Jim helps out other start-up businesses as an investor on the Canadian Program “ Dragons Den”. It’s a similar to the American show “Dragons Den”.
Jim Treliving now lives in Texas as he still monitors his Boston Pizza Franchise with his friend George Melville. The main office of the Boston Pizza franchise still resides in Vancouver, B.C.

THE FAMOUS BOSTON PIZZA DOUGH RECIPE
[Pizzeria-Style 24-Hour Cold-Ferment Dough]
This recipe is designed for a long, slow fermentation in the refrigerator, which develops a classic chewy texture and a much more complex, pizzeria-style flavor. Please understand it’s not my same day Ezzy Pezzy Pizza Dough
TIP : I highly recommend weighing your flour rather than using measuring cups. If you must use cups, use the ‘spoon and level’ method so you don’t accidentally pack the flour down.
The Reason and Ratio :
The Ratio (The “Gold Standard”)
When converting recipes or setting your scale, use this standard ratio:
1 Cup of Flour = 120 grams to 125 grams
• If a recipe calls for 5 cups: 5 \times 120g = 600g.
• If you scooped it (The mistake): You likely used 5 \times 150g = 750g.
Pizzeria Cold Fermentation Recipe
Yields: 3 medium (14 -inch) pizza crusts
INGREDIENTS:
- 5 cups ( 600 g) Bread Flour (or ’00’ Pizza Flour)
- 2 cups ( 475ml) Cool Water (around 65-70°F / 18-21°C)
- 3 teaspoons (approx. 3-4g) Active Dry Yeast
- 2 teaspoons (approx. 12g) Fine Sea Salt
- 6 tablespoons (approx. 14g) Olive Oil
- 1.5 teaspoons (approx. 4g) Sugar (Optional: helps with browning in a home oven)
METHOD:
- Activate Yeast (Optional but Recommended): In a small bowl, add the 1 teaspoon of yeast and 1 teaspoon of sugar to 1/2 cup of the warm water ( not hot !) Stir gently and let it sit for 10 minutes. It should get slightly foamy or creamy.
- Note : You now have 1 1/2 cups of cool ( room temperature) water.
- Chef’s Note: Unlike my fast dough, ( Easy Pezzy Pizza Dough) we’re not using all warm water. We want this to be a slow process from the start.
- Combine Dry Ingredients: In the large bowl of your stand mixer, whisk together the 5 cups of flour ( do not pack / loose) and do not add the 2 teaspoons of salt yet.
- Mix the Dough:
- Attach your dough hook. Add flour first and the dry 2 teaspoons of yeast. Mix.
- Now add the wet yeast mixture, the remaining 1.5 cups of cool ( room temperature) water, and the 6 tablespoons of olive oil to the flour.
- Turn the mixer on low speed and mix until a shaggy dough comes together.
- Now add 2 teaspoons of salt.
Why? Adding salt after the flour is hydrated protects the yeast from direct contact with concentrated salt. - Continue to knead on low-to-medium speed for 10 minutes. The dough should become smooth, elastic, and pull away cleanly from the sides of the bowl.
- The True Boston Pizza Style is a specific pan pizza. It requires the dough to proof in the pan to get fluffy. We will use the Pizzeria Style to make it easier.
- Portion and Oil (The Pizzeria Step):
- Turn the dough out onto a very lightly floured counter. Do not knead it any further.
- Using a bench scraper or knife, divide the dough into 3 or 4 equal portions (depending on the size of pizzas you want).
- Gently form each portion into a smooth, tight ball by tucking the “seams” underneath.
- Lightly oil each dough ball with a little olive oil.
- The Cold Ferment (The Marathon):
- Place each dough ball into its own individual container (a lidded container, a deli container, or even a covered bowl).
- Crucial Step: Place the covered containers IMMEDIATELY into the refrigerator.
- Let the dough ferment in the fridge for a minimum of 24 hours. (It will get even better at 48 or 72 hours). The dough will rise very, very slowly.
- Using the Dough (The Finish Line):
- About 2 hours before you plan to make pizza, remove the container(s) from the refrigerator.
- Leave the dough, still covered, on the counter at room temperature. This takes the chill off and lets the dough “wake up,” making it pliable and easy to stretch.
- When ready, generously flour your counter, gently remove a dough ball, and press it out into your pizza, just like you would at the restaurant.
- Begin spreading out your Boston Pizza Dough starting from the centre of your well oiled or sprayed Pizza Pan,. This will give you one extremely large pizza OR cut into individual pizzas. Press out with fingers and keep going until the pan is filled. If you like — Sprinkle Semolina or Cornmeal onto counter and then spread out dough before adding to Pizza Pan
- Add your marinara sauce ( Click on Recipe) spreading out from the centre.
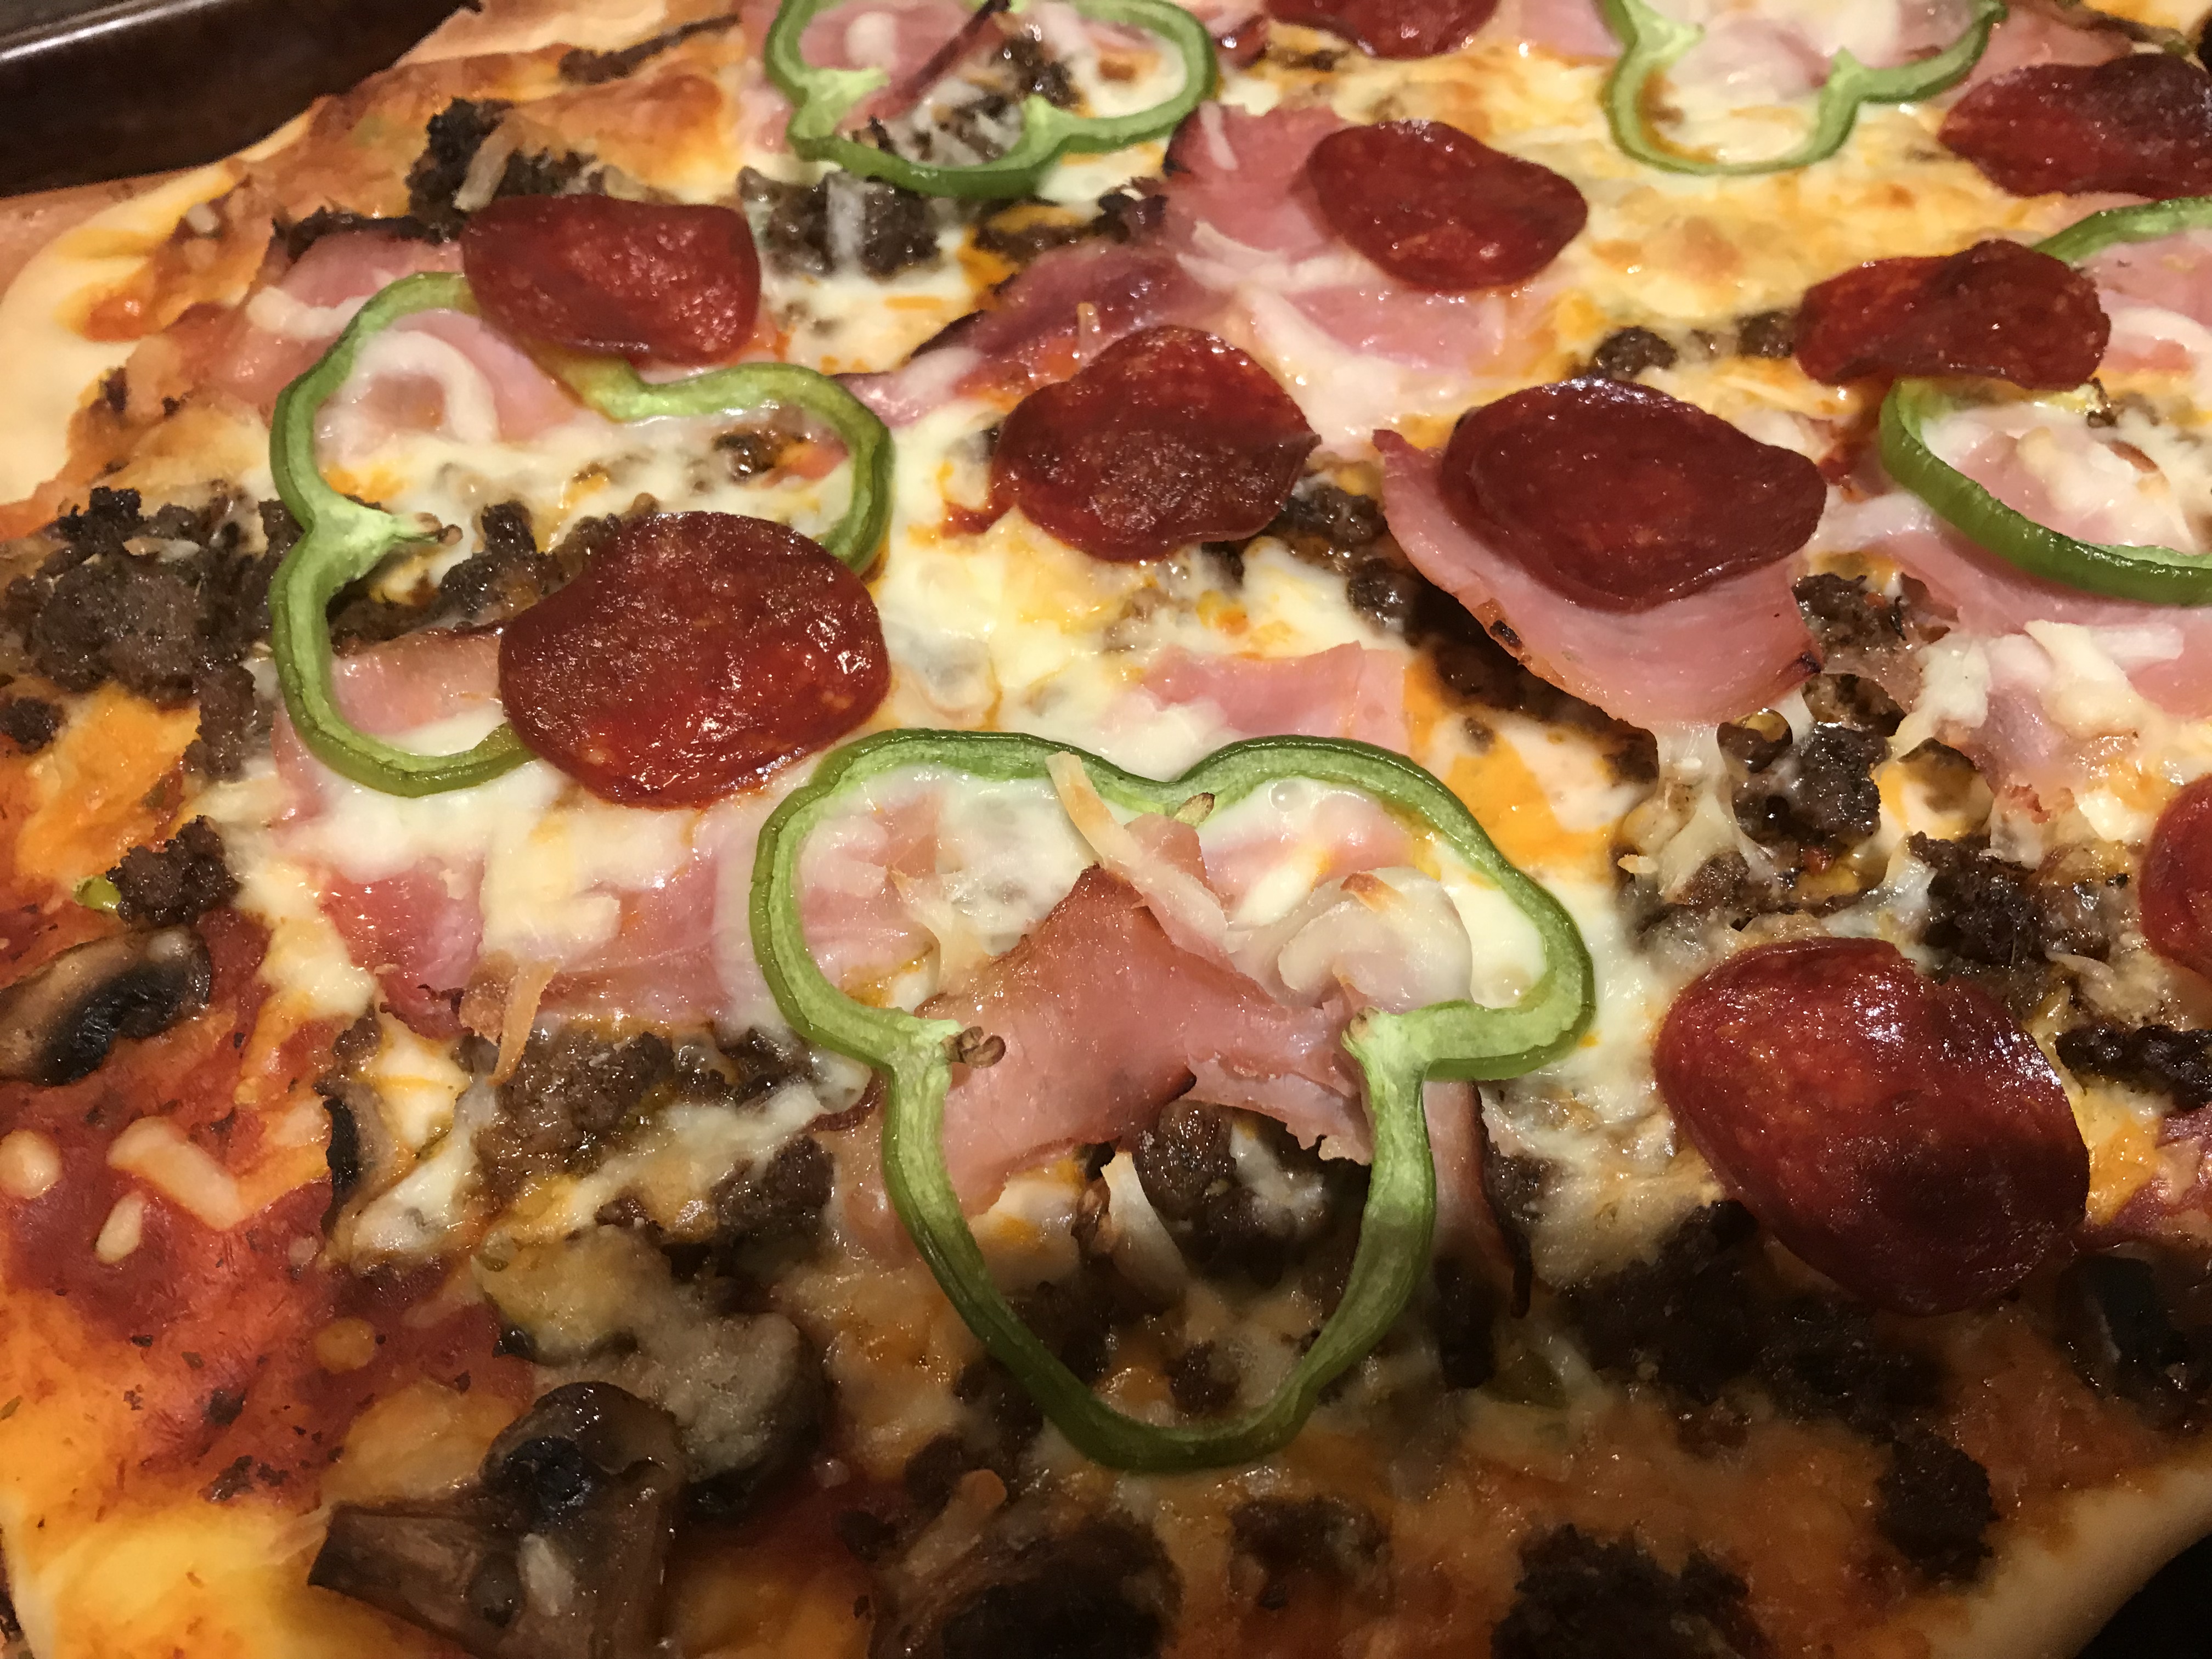
- Add your toppings, such as sliced pepperoni or whatever is your desire. Of course, top that with 100 % of mozzarella cheese. The full fat will give you that beautiful stringy stretchy tip of cheese.
- Finally, sprinkle on the outside edges of the pizza dough with course Semolina or cornmeal. I also like to finish off with some fresh sprigs of basil ( See my photo below).
- Place in preheat oven at 425 degrees F and let cook for 15 – 20 minutes (depending on your oven and size of pizza 🍕.


Enjoy!
Chef Bari
Please take a minute to purchase my cookbook “Canadian Recipes of the Great White North”
or

- The Original Drive-Thru: How Pompeii Invented Fast Food
- Professional Yorkshire Pudding
- Creamy Shrimp & Chicken Linguine
- Homemade Beast: Roast Beef Philly-Style Cheesesteak Sandwich
- The Next Hell’s Kitchen: Canada’s First at River Cree!
- March 2026
- February 2026
- January 2026
- December 2025
- November 2025
- October 2025
- September 2025
- August 2025
- July 2025
- June 2025
- May 2025
- April 2025
- March 2025
- February 2025
- January 2025
- December 2024
- November 2024
- October 2024
- September 2024
- August 2024
- July 2024
- June 2024
- May 2024
- April 2024
- March 2024
- February 2024
- January 2024
- December 2023
- November 2023
- October 2023
- September 2023
- August 2023
- July 2023
- June 2023
- May 2023
- April 2023
- March 2023
- February 2023
- January 2023
- December 2022
- November 2022
- October 2022
- September 2022
- August 2022
- June 2022
- February 2022
- December 2021
- November 2021
- October 2021
- March 2021
- November 2020
- October 2020
- September 2020
- July 2020
- June 2020
- May 2020
- March 2020
- January 2020
- November 2019
- October 2019
- February 2019
- June 2018
- April 2017
- December 2016
- October 2016
- September 2016
- August 2016
- April 2016
- March 2016
- January 2016
- August 2015


Leave a Reply to From My Kitchen to Yours : Exposing the Truth Behind Restaurant Pasta Prices – chefbariCancel reply